
Unprofessional
At work a couple of weekends ago, I leaned against a metal shelf with a handle on it. As I pulled away to move on to the next task, I tore a large hole in my scrub top. Thankfully, I had a t- shirt on underneath. For the rest of the shift, I thought about how I would have to order a new top, and how I didn’t really have money in the budget for that. Then I remembered that I could fix it, even if it was a big hole.
My hesitancy in fixing a big hole is that it would probably be noticeable, even if I tried hard to disguise it. Usually, I choose a bold and contrasting patch – I love the look of visibly mended clothing. I like the aesthetics and I want others to see that it is possible, so they might think repair rather than replace, too.

This cute heart patch could be some added adornment for fun or covering a hole or stain. We’ll never know.

Raised Fishbone Stitch is covering a small hole.

A small patch made with cute fabric to cover a stain.
A noticeable patch might read as “unprofessional” to some at work. Nursing school was filled with messages of what it meant to be professional. I look at a lot of that messaging now through different eyes that see it as coded language for classist and racist ideas of what it means to be a nurse. It’s my job to push back against those ideas. So I set out to make a patch that would make the shirt feel more comfortable for me (less drafty 😊) and that might challenge the notion that a mended top is unprofessional.
I couldn’t find an exact match for the red fabric. The embroidery floss was much closer. I thought about a stitch that could cover this tear with just floss. I scrolled through the Stitch Library on our website and wondered if Rhodes Stitch might work. I tried it and finished late at night. I didn’t love it, but thought I should re-evaluate in the morning. In the morning light, I knew this would not do. It was bunchy and puckered and heavy and obvious in a bad way. Thankfully I turned to York who reminded me that if I can mend – I can re-mend. So try again, I did.

Rhodes Stitch is a lovely stitch, but the larger it gets, the bulkier it gets.

If you’re ever unhappy with a mend, you can always try again.
I took a polka dot print and put it under the close-enough red fabric to mark out a grid. I attached the red fabric to the shirt with a safety pin, then proceeded to make little crosses over each mark on the grid. I used Buttonhole Stitch around the edge to prevent fraying. This part looks especially done by hand – the stitches are close, but not exactly the same. Honestly, it’s my favorite part. It holds the patch closely, too, which should help protect against further tears.

Some polka dot fabric, an almost match red patch and some floss are what I needed to make this mend.

The polka dot fabric helped me to evenly space my stitches without having to draw a grid.
I’m passing along the challenge to extend mending not just to play clothes, but also to our workwear as well. Tag us on Instagram with your work mends. We would love to see what you do.

A perfectly imperfect patch.

My version of a professional visible mend.
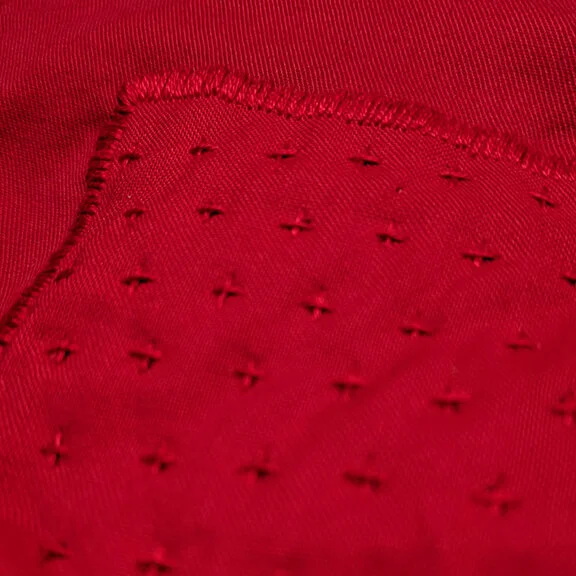
I love the look of a patch stitched by hand.