
Color Me In
I have been studying the various embroidery stitches for awhile now. I love to discover new stitches that will add an interesting texture to a project. Regardless of my stitch explorations, I have found there are some stitches that are good for almost every project. Satin Stitch is one of these stitches. It’s great to fill in those areas where you want a really smooth texture. There are four different Satin Stitch options from which to choose: Satin Stitch, Surface Satin Stitch, Padded Satin Stitch and Encroaching Satin Stitch. Let’s explore these options to see which will work best for you and your project.

This mushroom patch has Satin Stitch “dots”.
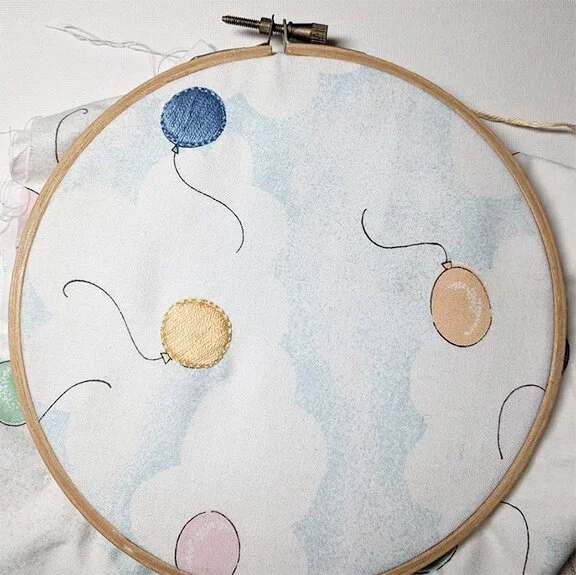
Adding Satin Stitch to these balloons is great way to practice this stitch.

The top of the little mushroom is made with Padded Satin Stitch, and the stems are Satin Stitch.
Satin Stitch is not complicated in theory, but it can be difficult to get the nice, smooth look that this stitch is known for. The fewer number of strands you use, the smoother the texture will be. This can be great except that it takes a lot longer to do this stitch with a single strand. It’s a trade-off that you will need to make for yourself and your project. The good news is that two strands is still pretty smooth, but it can be done much faster than a single strand. With practice, you will get better at positioning your stitches so it’s really smooth. The biggest downfall to this stitch is the amount of floss it uses. The front of your work is very similar to the back. It’s almost a reversible stitch which is nice, but there’s a lot of floss on the back of your work which won’t be seen.

Samples of Satin Stitch using 1-6 strands of floss. The bottom right image shows the back of the work.
If you don’t like wasting floss like that or need to conserve, you can try another option, Surface Satin Stitch. This stitch keeps the majority of your floss on the front where it can be seen. It’s essentially using half the amount of floss as standard Satin Stitch. The hard part with this version is how close the points are where you come up with your needle to where you just brought the floss to the back of your work. If you’re using fewer strands, you can easily just undo your previous stitch which can be frustrating. You can kind of alternate your stitches, so you aren’t aligning your stitches right next to each other until you come back through. You won’t undo your stitches, but it’s a little harder to figure out the overall spacing.

Diagrams showing the front and back of Surface Satin Stitch showing two alternate methods.
Satin Stitch can be a little bit puffy, especially if you’re using 6 strands of floss, but sometimes you might want it to be more pronounced than other areas. Padded Satin Stitch is here to save the day. In order to get more depth to your stitch, you will first outline the shape to be filled with Back Stitch. Then you will scatter Seed Stitch throughout the shape. Now you will do standard Satin Stitch on top of those stitches. Since you are layering over other stitches, you will get a nice puffy area that is smooth on top. The benefit here is that you can use more strands for the base stitches, then switch to 1 or 2 strands to make the top layer super smooth. Sometimes it’s nice to combine areas of Satin Stitch with areas of Padded Satin Stitch to get a little more interest in your project.

Diagram of the steps to do Padded Satin Stitch.
The last option you can try is Encroaching Satin Stitch. Sometimes the area you want to fill with Satin Stitch is too large for the stitches to lay nicely. To shorten the stitches, you can use Encroaching Satin Stitch. You will divide the area into smaller regions and then fill those in with Satin Stitch. You will see the “lines” where the rows of Satin Stitch meet. You can divide it evenly, but you can also break it up in another way that can add some textural detail to that area. If you really don’t like seeing these lines, but the area is too large to use Satin Stitch neatly, I recommend Long and Short Stitch as another alternative.

Diagram showing how to do Encroaching Satin Stitch.
Now that you know how to make these stitches, you’re probably wondering how to decide which one to use. I made samples of each so you can see them side by side. If you’re concerned about the amount of floss that is used, Surface Satin Stitch uses the least followed by Satin, Encroaching Satin and Padded Satin. It’s a little difficult to see in the photographs, but Surface Satin stitch has the least depth, followed by Satin Stitch then Padded Satin. Encroaching Satin Stitch is a great option for really large areas of Satin Stitch to decrease your stitch length. We would love to see what you’re making using one (or more) of these stitches. Tag us on Instagram so we can see!

Satin Stitch (pink), Surface Satin Stitch (yellow), Padded Satin Stitch (blue) and Encroaching Satin Stitch (orange) samples.

Satin Stitch (pink), Surface Satin Stitch (yellow), Padded Satin Stitch (blue) and Encroaching Satin Stitch (orange) samples.